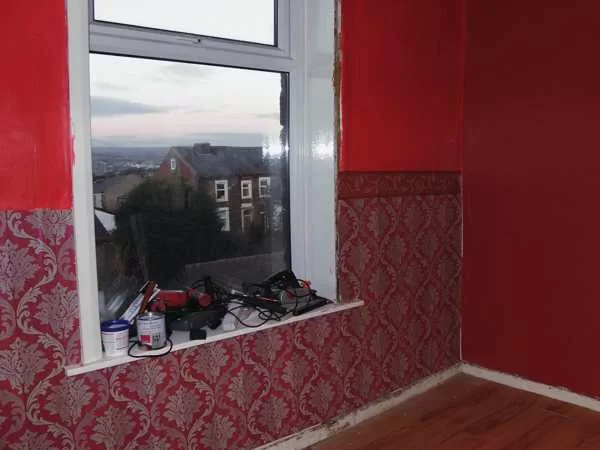
Sunday mornings can be a time for leisurely starts, but not today! With the wallpaper dry and ready for action, it was time to dive headfirst into the world of paint and patterns.
Painting Progress: A Smooth (Almost) Start
The first coat of paint glided onto the primed surface with ease, a welcome sign of smooth sailing ahead. While the paint dried, I tackled other minor tasks, keeping the momentum going.
Second Coat Seals the Deal (and the Blotches)
The second coat of paint arrived like a hero, expertly erasing any blotches left behind by the first. The project was steadily gaining traction, a sense of accomplishment filling the air.
Pattern Power: Unveiling the Vision
With the paint dry once more, it was time for the star of the show – the patterned wallpaper. Unfurling and hanging the paper revealed more of the design direction, offering a glimpse of the final vision. (A friendly note: flash photography can be a bit of a villain in this situation, not quite capturing the true essence of the colors.)
A Taste of the Border: Setting the Stage
To give you a sneak peek of the complete look, I installed a single length of the border. This small addition helps to set the stage for the overall design.
The Transformation Takes Shape: A Project in Motion
The room is starting to transform, piece by piece. The wallpaper adds a layer of personality, and the border promises to tie everything together beautifully.
Keeping Track of the Budget: Every Penny Counts
Here’s a breakdown of today’s expenses:
- Three rolls of lining paper (20 meters, 2000 Grade): £7.99 each (total £23.97)
- Two cans of Johnson’s Rich Red Silk finish Emulsion paint (2.5 liters): £7.99 each (total £15.98)
- Two cans of B&Q Colours range Classic Red quick-drying gloss paint (750 ml): £11.98 each (total £23.96)
- One packet of wallpaper paste: £1.00
Today’s total expenditure comes to £68.90, bringing the running total for the project to £195.50.
With the foundation laid and the vision taking shape, the project is progressing at a steady pace. Stay tuned for further updates as this DIY adventure unfolds!

