Laminate flooring – a double-edged sword for the DIY enthusiast. While it offers a beautiful and practical solution for many rooms, the installation process can test even the most patient soul. Today’s experience highlighted both the potential pitfalls and the tools that can make the journey smoother.
The Laminate Laying Lowdown: A Battle of Clicks
Let’s delve into the frustrations of laminate. The “click and lock” system, designed for ease of use, sometimes seems to have a mind of its own. One end connects flawlessly, only to be dislodged as the other is clicked into place. Some pieces glide in effortlessly, while others demand a twenty-minute wrestling match.
A Silver Lining: Chimney Breast Symmetry
One fortunate aspect of today’s project? The dimensions of the chimney breast perfectly matched the width of the laminate flooring, eliminating the need for intricate cuts. A small victory in the face of the larger battle.
Essential Arsenal for the Flooring Foe:
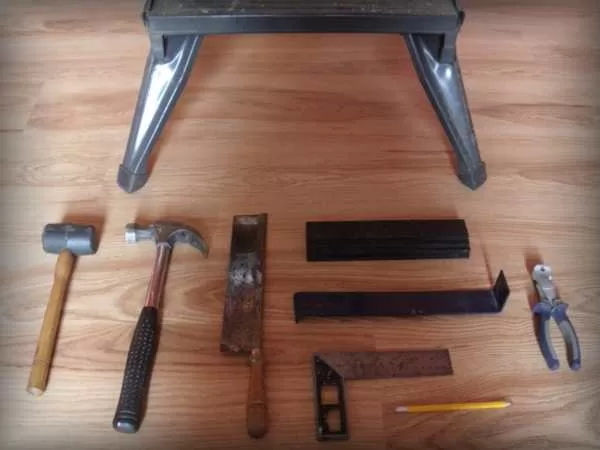
For any DIYer embarking on a laminate flooring adventure, having the right tools at hand is crucial. Here’s a breakdown of the essentials:
- Workmate: A versatile workhorse, a Workmate is invaluable for clamping pieces and providing a level work surface.
- Rubber Mallet: This protects your laminate flooring from damage while ensuring a secure fit when tapping pieces together.
- Claw Hammer: For tasks requiring heavier force, a claw hammer is handy.
- Pad Saw: Clean cuts are essential, and a pad saw achieves this without chipping the laminate edges, unlike some electric jigsaws.
- Stepped Tapping Block: This tool ensures a tight and secure connection between laminate planks by guiding your tapping force.
- Draw Hook: Use this with caution to adjust the position of planks, as it can damage the edges.
- Set Square and Pencil: Accurate measurements and square cuts are key for a professional finish. Achieve these with a set square and pencil.
- Pincers: For removing old nails or tacks, and for nibbling away laminate pieces in tight corners, a pair of pliers comes in handy.
Never Glue, Pin, or Nail Laminate Flooring:
Laminate expands and contracts with fluctuations in moisture and temperature. To accommodate this movement, it’s crucial to leave a gap of 5-10 millimeters around the entire room perimeter. This gap can be covered with quarter-round doweling, secured to the skirting boards, not the flooring itself.
Flooring for Now, Papering Awaits
With the bulk of the laminate flooring laid, the final step of cutting pieces to fit along the length of the room awaits. However, after a day of battling the click-and-lock system, a well-deserved break is in order. Tomorrow, the Warmaline paste will be dry, and the joy of wallpapering awaits – a welcome change from the flooring trials of today.
A Toast to Perseverance (and Beer):
To soothe the frustration and celebrate the progress made, a bottle of Shepherd Neame Amber Ale and a French tobacco smoke session sound like the perfect remedy. And for a dose of wonder, an “Horizon” documentary on black holes seems like a fitting way to end the day.
Project Costs Breakdown:
- Four packs of Oak Plank Effect Laminate Flooring from B&Q (on offer): £12.00 per pack (total £48.00)
Running Total: £126.60
While laminate flooring can pose a challenge, with the right tools, knowledge, and a healthy dose of perseverance, the satisfaction of a job well done is definitely worth the effort. Stay tuned for further updates on this DIY journey, with the promise of (hopefully!) smoother sailing in the world of wallpapering.

